If you are developing an interactive web app, it is very common practice to update the user interface dynamically based on different application events and user actions. These actions raise events and as a developer, it is our job to handle these events using some event handling techniques. Blazor has built-in support to handle several events such as onclick, onchange and onmousemove, etc. and it also provides developers multiple ways to handle these events. In this tutorial, I will give you an overview of Blazor event handling. You will also learn how to use event arguments and lambda expressions and how you can pass additional parameters to your event handlers in Blazor.
Getting Started with Blazor Event Handling
The basic syntax of handling events in Blazor is following
@on[DOM EVENT]=”[DELEGATE]”
In the above syntax
- The [DOM EVENT] is the placeholder for DOM events such as click, mouseup, etc.
- The [DELEGATE] is the placeholder for C# delegate event handler.
Let’s say you want to handle a button click event you can apply the above syntax as follows:
<button @onclick=”Update” />
Let’s cover the event handling in more detail with some practical examples. Create a new Blazor Server App in Visual Studio 2019 and then add a new Blazor component Calculator.razor.
@page "/calculator"

<h3>Calculator</h3>

<div class="form-group">
    <label for="number1">Number 1</label>
    <input type="number" class="form-control" id="number1" @bind="number1">
</div>
<div class="form-group">
    <label for="number2">Number 2</label>
    <input type="number" class="form-control" id="number2" @bind="number2">
</div>
<div class="form-group">
    <label><b>Total: </b>@total</label>
</div>

<button class="btn btn-primary" @onclick="Calculate">Calculate</button>
<button class="btn btn-secondary" @onclick="Clear">Clear</button>

@code {
    private int number1 = 0;
    private int number2 = 0;
    private int total = 0;

    private void Calculate()
    {
        total = number1 + number2;
    }

    private void Clear()
    {
        number1 = 0;
        number2 = 0;
        total = 0;
    }
}
The above component has two buttons Calculate and Clear and they both are handling onclick event and calling Calculate and Clear methods written in the @code block above.
<button class="btn btn-primary" @onclick="Calculate">Calculate</button>
<button class="btn btn-secondary" @onclick="Clear">Clear</button>
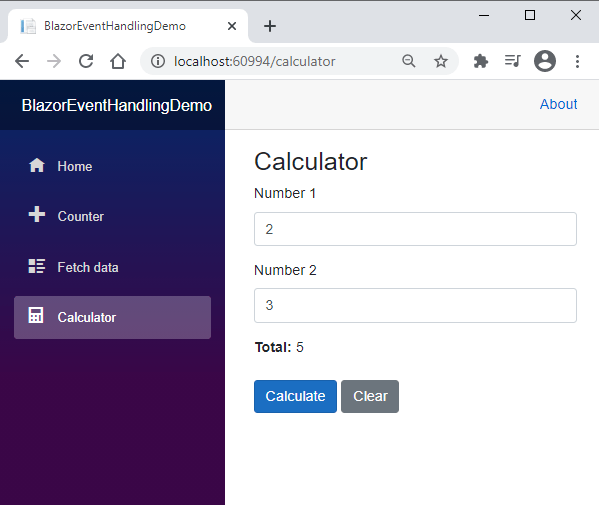
If you will run this simple example, you will see a page similar to the following. Input some numbers in the text fields and then press the buttons to see event handling in action.

Blazor also supports asynchronous delegate event handlers as shown in the code snippet below. These types of handlers can return a Task and inside these handlers, we can call an async method with the await keyword.
private async Task Clear()
{
    await Task.Delay(10);

    number1 = 0;
    number2 = 0;
    total = 0;
}
Understanding Blazor Event Arguments
Most of the Blazor event support event arguments which are the objects that can carry the extra information about the event occurred. For example, a KeyboardEventArgs can provide us the details about the keyboard key users press.
Let’s create a basic component with a standard HTML div element as shown below.
@page "/mouseevents"

<h3>Mouse Events</h3>

<div style="width: 400px; height: 400px; background: lightblue" @onmousemove="Move"></div>
<label><b>Coordinates: </b>@coordinates</label>

@code {
    private string coordinates = "";

    private void Move(MouseEventArgs e)
    {
        coordinates = $"{e.ScreenX}:{e.ScreenY}";
    }
}
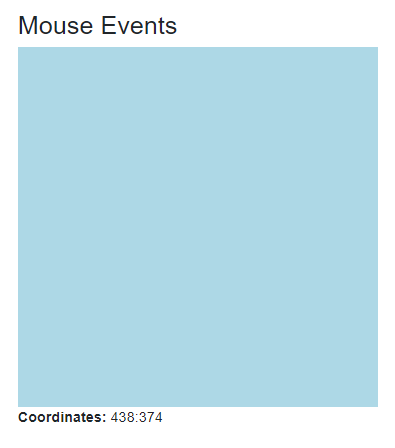
The div element is handling onmousemove event and passing the MouseEventArgs to the event handler method named Move. The Move even handler then updating the local field coordinates with the X and Y position of the mouse using ScreenX and ScreenY properties available in MouseEventArgs class. Run the app and try to move the mouse inside the div and you will see the coordinates updating in real-time.

Blazor supports a big list of EventArgs objects but the most commonly used EventArgs are shown in the following table.
| Event | Class | DOM Events |
| Focus | FocusEventArgs | onfocus, onblur, onfocusin, onfocusout |
| Input | ChangeEventArgs | onchange, oninput |
| Keyboard | KeyboardEventArgs | onkeydown, onkeypress, onkeyup |
| Mouse | MouseEventArgs | onclick, oncontextmenu, ondblclick, onmousedown, onmouseup, onmouseover, onmousemove, onmouseout |
| Mouse wheel | WheelEventArgs | onwheel, onmousewheel |
| Touch | TouchEventArgs | ontouchstart, ontouchend, ontouchmove, ontouchenter, ontouchleave, ontouchcancel |
You can see the full list of EventArgs on Microsoft Blazor docs page.
Using Lambda Expressions with Blazor Events
Blazor also support Lambda expressions as the delegate event handler. You should use these expressions only for simple use cases and should avoid these if you have lot of code to execute. Let’s modify our Calculator example and this time use Lambda expressions instead of Calculate and Clear methods we used above.
@page "/calculator"
<h3>Calculator</h3>
<div class="form-group">
    <label for="number1">Number 1</label>
    <input type="number" class="form-control" id="number1" @bind="number1">
</div>
<div class="form-group">
    <label for="number2">Number 2</label>
    <input type="number" class="form-control" id="number2" @bind="number2">
</div>
<div class="form-group">
    <label><b>Total: </b>@total</label>
</div>

<button class="btn btn-primary" @onclick="@(e => total = number1 + number2)">Calculate</button>
<button class="btn btn-secondary" @onclick="@(e => total = number1 = number2 = 0)">Clear</button>

@code {
    private int number1 = 0;
    private int number2 = 0;
    private int total = 0;
}
Passing Additional Parameters to Event Handlers
Sometimes, we want to pass additional parameters to event handlers as per your application requirements. For example, if you are in a loop, you may want to pass the loop iteration index number to an event argument so that you know for which item in the loop this particular event handler is executed. Another simple example would be to call the same event handler from two or more controls and pass the reference of the control handling the event. Let’s cover this concept with a basic example. Modify the Calculator code once again as per the following code snippet.
<div class="form-group">
    <label for="number1">Number 1</label>
    <input type="number" class="form-control" id="number1" @bind="number1">
</div>

<div class="form-group">
    <label for="number2">Number 2</label>
    <input type="number" class="form-control" id="number2" @bind="number2">
</div>

<div class="form-group">
    <label><b>Total: </b>@total</label>
</div>

<button class="btn btn-primary" @onclick="@(e => Calculate(e, 1))">Add</button>
<button class="btn btn-primary" @onclick="@(e => Calculate(e, 2))">Subtract</button>

<button class="btn btn-secondary" @onclick="Clear">Clear</button>

@code {
    private int number1 = 0;
    private int number2 = 0;
    private int total = 0;

    private void Calculate(MouseEventArgs e, int buttonType)
    {
        switch (buttonType)
        {
            case 1:
                total = number1 + number2;
                break;
            case 2:
                total = number1 - number2;
                break;
        }
    }

    private void Clear()
    {
        number1 = 0;
        number2 = 0;
        total = 0;
    }
}
The important lines in the above code snippet are following where I am passing an additional parameter to the Calculate method with the value 1 and 2
<button class="btn btn-primary" @onclick="@(e => Calculate(e, 1))">Add</button>
<button class="btn btn-primary" @onclick="@(e => Calculate(e, 2))">Subtract</button>
The code of Calculate method is also modified slightly as it is now accepting an additional argument buttonType. Inside the method, we are doing addition or subtraction depending upon the buttonType argument value.
private void Calculate(MouseEventArgs e, int buttonType)
{
    switch (buttonType)
    {
        case 1:
            total = number1 + number2;
            break
        case 2:
            total = number1 - number2;
            break;
    }
}
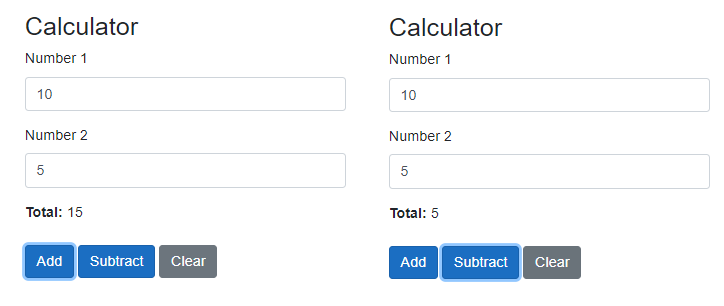
Run the app once again and try to click both Add and Subtract methods and you will see the same Calculate method will give us a different result.


