ASP.NET Core introduced many new concepts, which developers need to learn to develop modern web-based applications. One of the concepts is “Middleware” which allows developers to run a series of components (aka Middleware) during a web request and response processing. In this tutorial, I will give you an overview of ASP.NET Core Middleware. We will also learn how to build a request/response pipeline using some built-in Middleware available in ASP.NET Core.
Table of Contents
What is Middleware?
Middleware is a component or a piece of code that handles incoming requests and outgoing responses. These components are chained together in such a way that each component in the pipeline gets the chance to run some logic or process requests before passing the request to the next Middleware in the pipeline. Each middleware also gets the chance to process the outgoing responses in reverse order.
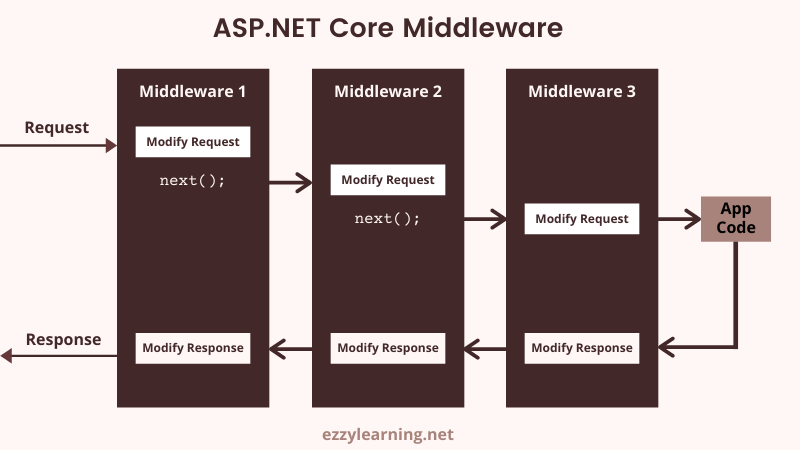
Configuring Middleware Pipeline
We typically configure the ASP.NET Middleware in the Configure method of our Startup.cs file using the IApplicationBuilder class whose instance is available as a parameter inside the Configure method.
public class Startup
{
    public void Configure(IApplicationBuilder app, IWebHostEnvironment env)
    {
        // Configure Middleware Pipeline Here
    }
}
To build the request pipeline, we need to chain together multiple instances of a built-in ASP.NET Core delegate called RequestDelegate. The RequestDelegate represents any method that accepts HttpContext as a parameter and returns Task. Each delegate can perform operations before and after the next delegate.
public delegate System.Threading.Tasks.Task RequestDelegate(HttpContext context);
We can use Run, Map, or Use extension methods on IApplicationBuilder class to configure RequestDelegates in two different ways.
- We can configure middleware inline as an anonymous method. This type of Middleware is called inline middleware.
- We can also create a reusable C# class and configure that class as a middleware.
A simple example of an inline Middleware is given below where we are using Run extension method to configure a single request delegate to handle all the incoming requests. The following anonymous function will be called in response to every HTTP request.
public class Startup
{
    public void Configure(IApplicationBuilder app)
    {
        app.Run(async context =>
        {
            await context.Response.WriteAsync("Hello, World!");
        });
    }
}
The Run method used in the above example does not receive the next parameter which means it cannot call the next middleware in the pipeline. We normally use the Run() method at the end of the pipeline when we want to terminate the pipeline and has no further Middleware to execute. To configure multiple middleware components in a sequence, we can use the Use() extension method as shown in the example below.
public class Startup
{
    public void Configure(IApplicationBuilder app)
    {
        app.Use(async (context, next) =>
        {
            if (context.Request.Path == "/hello")
            {
                await context.Response.WriteAsync("Hello World!");
            }

            await next();
        });

        app.Run(async context =>
        {
            await context.Response.WriteAsync("End of Middleware Pipeline.");
        });
    }
}
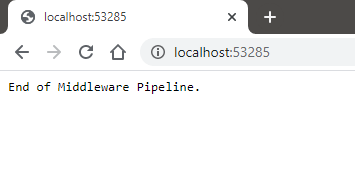
If the request URL does not ends with /hello then our first middleware code will not execute and the request will move to the next middleware that will write the text “End of Middleware Pipeline.” to the response.
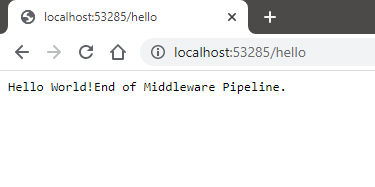
If the request URL ends with /hello then our first middleware code will execute and it will write “Hello World!” to the response and then the request will move to the next middleware that will write the text “End of Middleware Pipeline.” to the response.
Middleware Processing Order
One thing is very clear from the above simple example that the order in which the middlewares are configured is important. For example, we can easily reorder the First and Second middlewares in the example below and can execute code in a different order.
app.Use(async (context, next) =>
{
    await context.Response.WriteAsync("First");
    await next();
});

app.Use(async (context, next) =>
{
    await context.Response.WriteAsync("Second");
    await next();
});

app.Run(async context =>
{
    await context.Response.WriteAsync("Last.");
});
The following diagram shows the typical order in which the ASP.NET Core built-in middleware pipeline is configured to process requests and responses. It also shows where we can add our custom middlewares to run our custom logic.
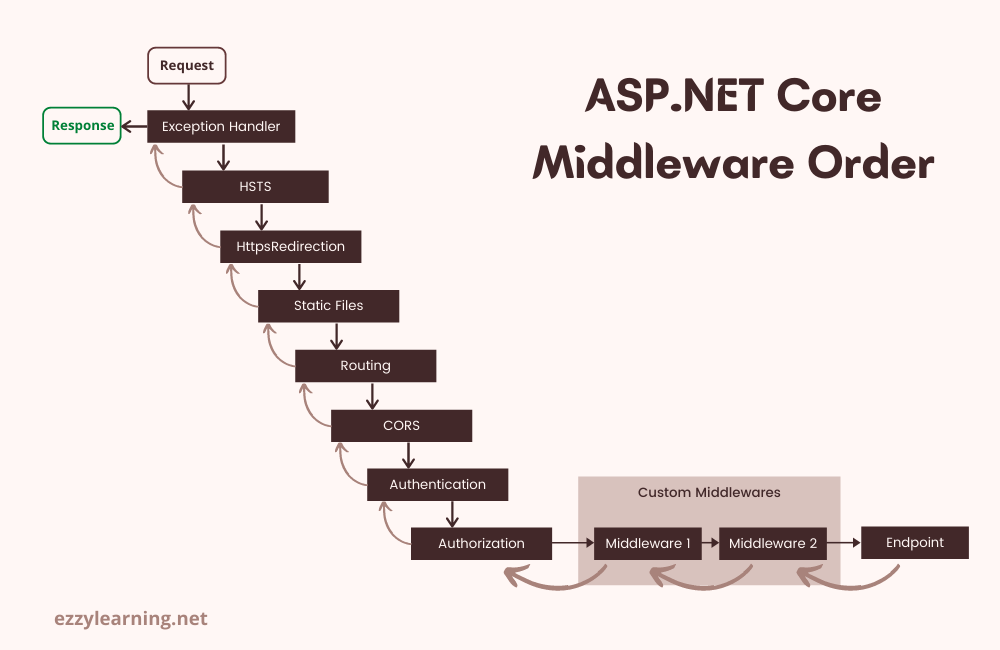
In a real-world application, it is not recommended to define all of your middleware components inline within the Startup.cs file. We can create separate C# classes and define our custom middleware in those classes as extension methods. The example below shows how to define custom middleware as an extension method in a separate C# class.
public static class ApplicationBuilderExtensions
{
    public static void UseFirstMiddleware(this IApplicationBuilder app)
    {
        app.Use(async (context, next) =>
        {
            await context.Response.WriteAsync("First");
            await next();
        });
    }

    public static void UseSecondMiddleware(this IApplicationBuilder app)
    {
        app.Use(async (context, next) =>
        {
            await context.Response.WriteAsync("Second");
            await next();
        });
    }

    public static void UseLastMiddleware(this IApplicationBuilder app)
    {
        app.Run(async context =>
        {
            await context.Response.WriteAsync("Last");
        });
    }
}
Once the above middleware is defined, you can call them in the Configure method of Startup.cs file as follows.
public void Configure(IApplicationBuilder app, IWebHostEnvironment env)
{
    app.UseFirstMiddleware();
    app.UseSecondMiddleware();
    app.UseLastMiddleware();
}
Using ASP.NET Core Built-in Middleware
ASP.NET Core is a modular framework, which means you can add/remove features and Middleware on demand. There are some built-in middlewares provided by ASP.NET Core and many more can be added as third party libraries via Nuget package manager. Some of the most common middlewares are Authentication, Authorization, MVC, Session, Static Files, etc. Most of the time, you just need to call a corresponding UseXXX method to configure a built-in or even third-party middleware. For example, if you want to display a welcome page to the website visitor, you can configure WelcomePageMiddleware as follows.
public void Configure(IApplicationBuilder app, IWebHostEnvironment env)
{
    app.UseWelcomePage();
}
If you will run your project in the browser, you will see the following Welcome page.
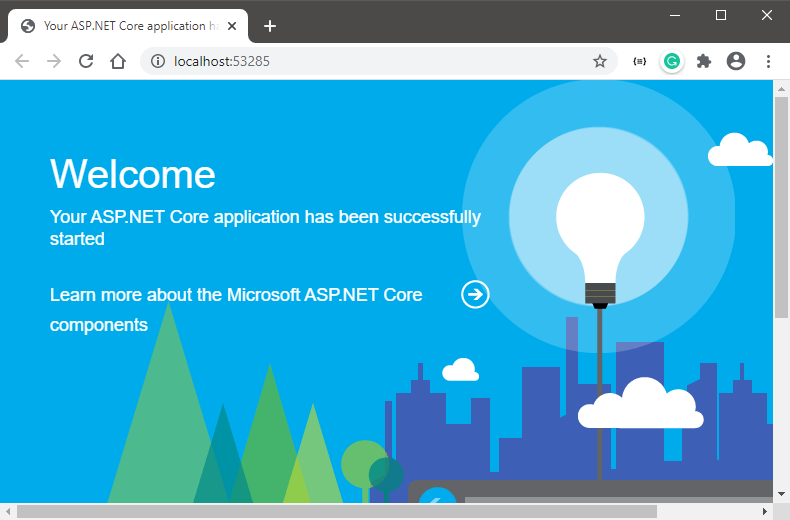
Above middleware is part of the Microsoft ASP.NET Core Diagnostics package that also contains some other useful middleware in it. For example, you can configure and display a different error page in development and production environments using the following two middleware.
if (env.IsDevelopment())
{
    app.UseDeveloperExceptionPage();
}
else
{
    app.UseExceptionHandler("/Home/Error");
}
Similarly, there are built-in middlewares to configure routing and static files e.g. Stylesheets, JavaScript, Images, etc. in your project.
app.UseStaticFiles();
app.UseRouting();
If you want to check the health of your application, you can register health check services and then configure an endpoint to view the application health as follows:
public void ConfigureServices(IServiceCollection services)
{
    services.AddControllersWithViews();
    services.AddHealthChecks();
}

public void Configure(IApplicationBuilder app, IWebHostEnvironment env)
{
    app.UseRouting();
    app.UseEndpoints(endpoints =>
    {
        endpoints.MapHealthChecks("/health");
    });
}
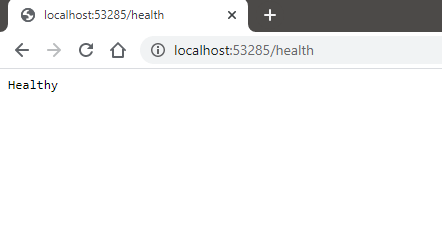
If you will run the application in the browser and will type /heath at the end of the URL, you will be able to see the “Healthy” message showing that your application is in good shape.
Obviously, I cannot cover all built-in middlewares in this tutorial so if you are interested to learn more about these middlewares, you can go to official Microsoft docs.
Summary
In this tutorial, I have covered the basics of ASP.NET Core Middleware to show you how you can write code to handle incoming requests and the outgoing response. Although I have written very basic middleware components in this tutorial but you can use same concepts to write more complex middleware in your applications.


